Making a Giant Snowflake Cinnamon Roll
We take turns hosting a Christmas brunch with my husband's family each year and even on those years it's not our turn to host we often bake up something yummy to bring with us. This year Alec found a pretty snowflake shaped filled bread in one of his cooking magazines but wanted to turn it from a savory bread into a sweet bread.

He decided to make a cinnamon roll and while I had debating about saving this recipe to share until next Christmas, I realized that the snowflake really is great for any winter party or occasion!
Ingredients:
Dough:
1/2 cup warm water (around 110 degrees F)
2 teaspoons sugar
2 1/4 teaspoons yeast (or one quarter ounce packet of active dry yeast)
3 1/2 cups all purpose flour (with a little extra for dusting/ kneading)
1 teaspoon baking powder
1 teaspoon salt
1 1/2 sticks cold butter (12 tablespoons) cut into small pieces
1/2 cup milk
Filling:
1/4 cup melted butter (you can add more if you need but basically you just want a nice light layer to hold the cinnamon/sugar in place without it running off the sides).
1 cup brown sugar
2 Tablespoons cinnamon
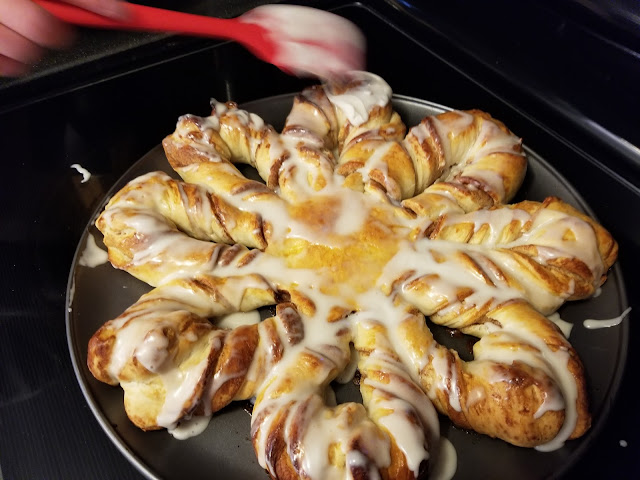
Glaze:
1 cup powdered sugar
2 teaspoons vanilla or maple extract
4 tablespoons milk or heavy cream
Directions:
In a small bowl combine warm water, sugar, and yeast and set aside for about 5 minutes until foamy.
In a separate bowl mix together flour, baking powder, and salt. Add in the bits of butter and work with fingers or two knives (or pastry cutter) until butter is broken into pea- sized pieces. Make a well in the center of the flour mixture and add in both yeast mix and milk. Stir with a wooden spoon until the flour is all mixed in
Once dough looks like a shaggy ball begin to knead with hands until you have a nice smooth dough ball. Cover the dough ball in the bowl with a towel and let rise at room temperature until doubled in size-- about an hour to an hour and half.
We prepared the dough in the afternoon on Christmas eve and left our dough ball to slow rise in the fridge overnight.
The next morning Alec set the dough out on the table to warm up a bit and mixed up his filling/ melted the butter.
He lightly floured his board and began kneading the dough 3 or 4 times until smooth. He flattened it to about an inch thick and folded it in thirds like a letter. Then he rotated the dough 90 degrees, rolled it out and folded it in thirds again; repeating this process 4 times in total until he had a nice workable piece of dough.

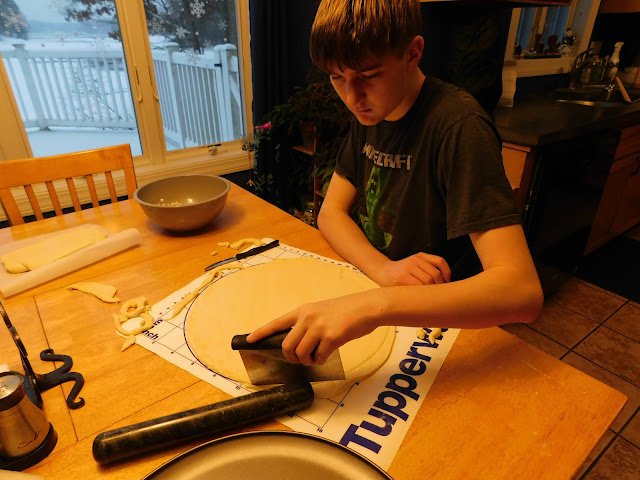
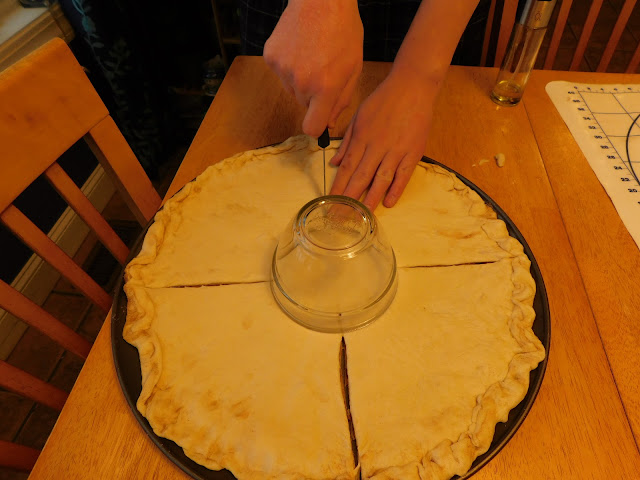
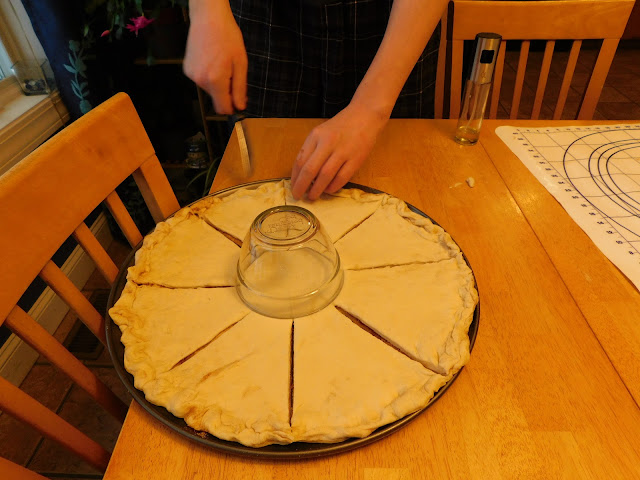
Once Alec had his dough all set he divided the dough into two equal pieces. Rolling out one to a giant circle and using our circle baking pan as a template cut it to fit our pan. We then slid the dough onto our pan. It was a brand new nonstick pan and we had zero problems with our dough sticking but you can grease the pan before if you're worried about that.
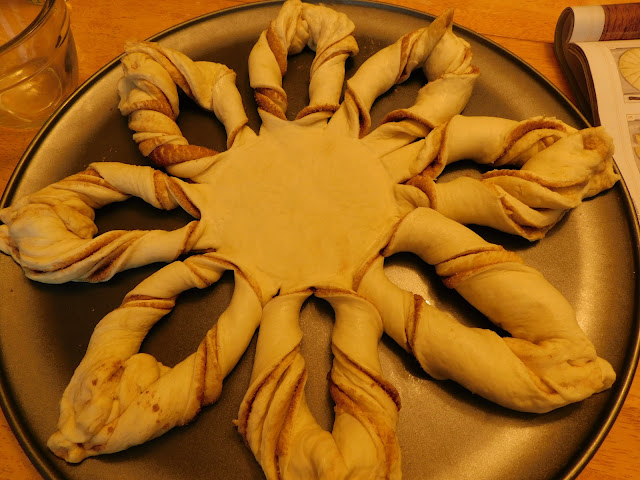
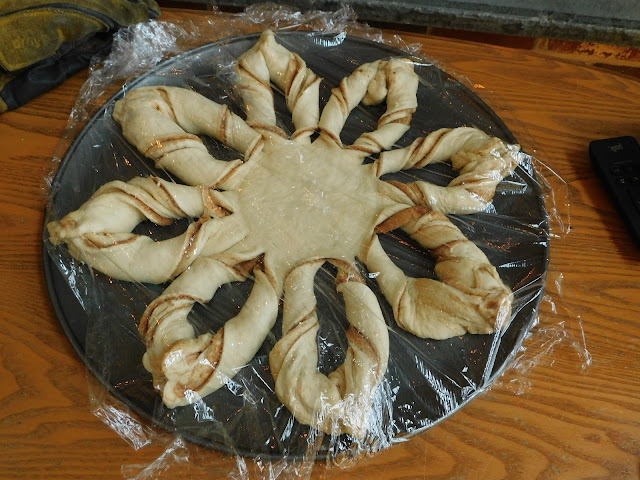
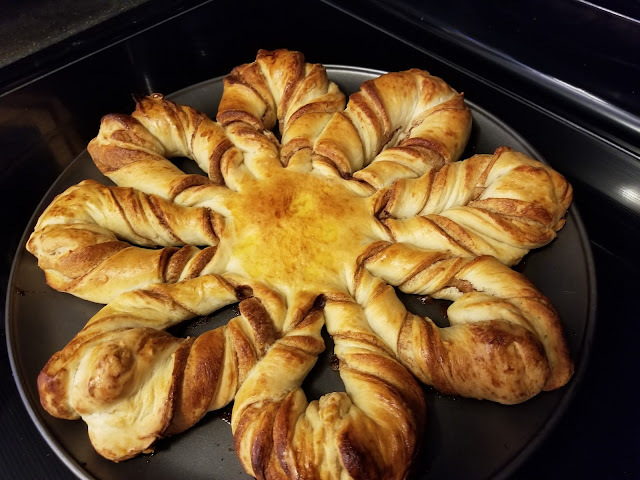
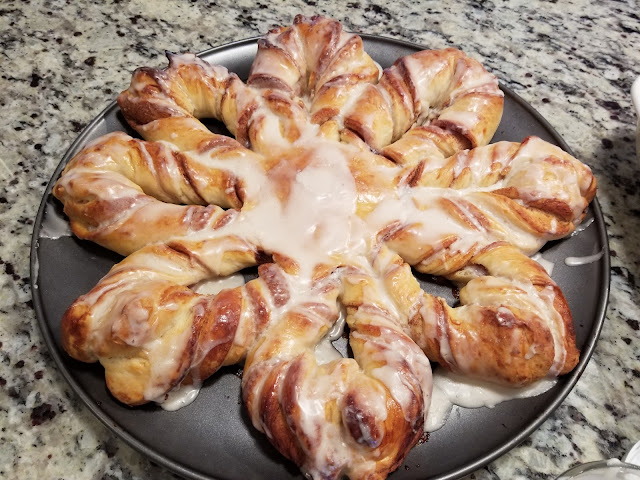
A bit fussy for sure but this would be great for any winter event where you want to add a little wow to your table.
Linking up with: Spread the Kindness,


OH my gosh...no words...too beautiful and yummy to describe! :)
ReplyDeleteLOL! It was amazing and I ate way more of that snowflake than I should have.
DeleteThat looks delicious!!
ReplyDeleteThank you!
DeleteOh this is beautiful and it looks so delicious, too!
ReplyDeleteIt was SO good!
DeleteThis looks amazing - thanks for sharing. Can't wait to try making this !
ReplyDeleteYou're welcome!
DeleteWow! It's so wonderful to have a talented baker in the house. I love how pretty the cinnamon roll looks and I bet it tasted delicious.
ReplyDeleteIt is so wonderful! I love that he is not afraid at all to experiment and push himself to keep trying new and more challenging projects too.
DeleteOh wow! That looks really pretty and I bet it tastes delicious too x
ReplyDeleteIt was soo good; there is nothing quite like fresh homemade cinnamon rolls.
DeleteWhat a beautiful idea... perfect to make all winter long!
ReplyDeleteThank you!
DeleteNow that's SO impressive. I think that turned out so perfect.
ReplyDeleteXOXO
Jodie
www.jtouchofstyle.com
Thank you!
DeleteJoanne, that is amazing and looks delicious! I'm going to have to give this a try! I haven't made a yeasted bread in years!
ReplyDeleteI hope you get a chance to try making it. It was a lot of fun to see everyone wowing over his hard work... plus it tasted great!
DeleteOh wow! It's almost too pretty to eat! Almost 😉
ReplyDeleteAlmost! But definitely worth eating too.
DeleteI think it's fantastic that your boys are into cooking. And it looks amazing!
ReplyDeleteI love that he's so into cooking!
DeleteThat looks amazing. Great job by your son. It looks delicious and intricate!
ReplyDeleteThank you!
DeleteThat is so pretty!!
ReplyDeleteDelicious too.
DeleteSo pretty! Looks to die for. I need to make time for more baking.
ReplyDeleteThank you!
DeleteSuch a grand snowflake and I bet yummy. Your son is a pro. Enjoy the rest of your week.
ReplyDeleteThank you!
DeleteAlec did a great job!! 👏🏻👏🏻👏🏻👏🏻I’ve been wanting to make ones of those.
ReplyDeleteThank you!
DeleteSuch a gorgeous bread! Alec is so talented, can't wait to see more...
ReplyDeleteThanks! It's great to see him working so hard and enjoying it.
DeleteLove the snowflake shape - that's so fun and festive!
ReplyDeleteI thought that was so neat too!
DeleteThat is beautiful.
ReplyDeleteThis is awesome!!! I love it and need to try it!
ReplyDeleteI thought it was going to be so much harder to make but it really wasn't bad and it was such a show stopper when he presented it. Plus it tasted amazing!
Delete