How to Make a Ribbon and Paperclip Angel Ornament in 4 Easy Steps
We had another quick and easy crafting project on our agenda today! We made some angel ornaments using paperclips, ribbons, beads, and buttons.

 |
| isn't it cute? |
Today, the boys spotted him hitching a piggy back ride from one our snowmen. Once the elf was found we were finally able to start our day.

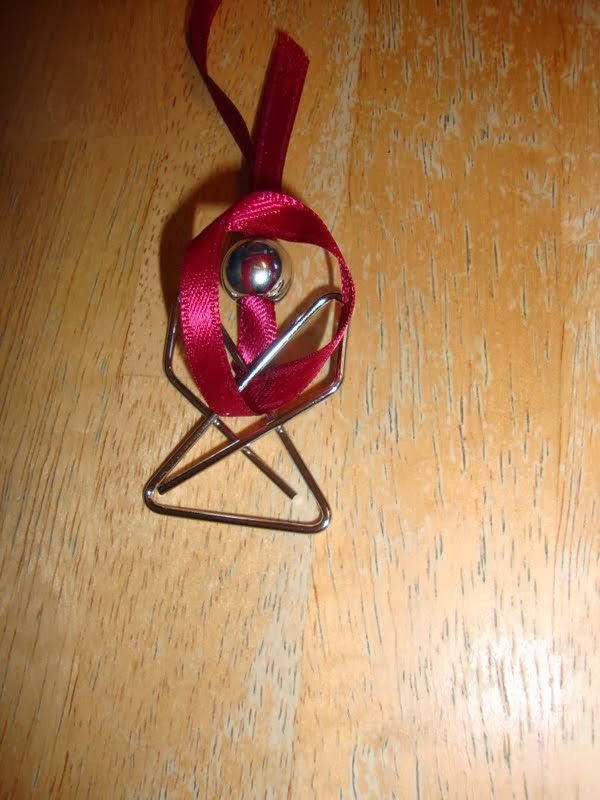
Our craft for today was making angel paperclip ornaments.
These were super easy!
All you need is:

Our craft for today was making angel paperclip ornaments.
These were super easy!
All you need is:
- butterfly paper clips (I found them at Staples-- I think I paid less than $4 for 50 of them)
- some large round beads in silver or pearl (we found silver)
- some 1/4" ribbon (which I had on hand already)
- buttons or pony beads for a halo

Step 2: Pull loop through the middle of the butterfly clip.

Step 3: We then folded the loop over our bead and pulled tight.

Step 4: We tried to tie off our ornament but I found our beads had such large holes that the beads slipped right off over our knots so we added a halo to our angels.
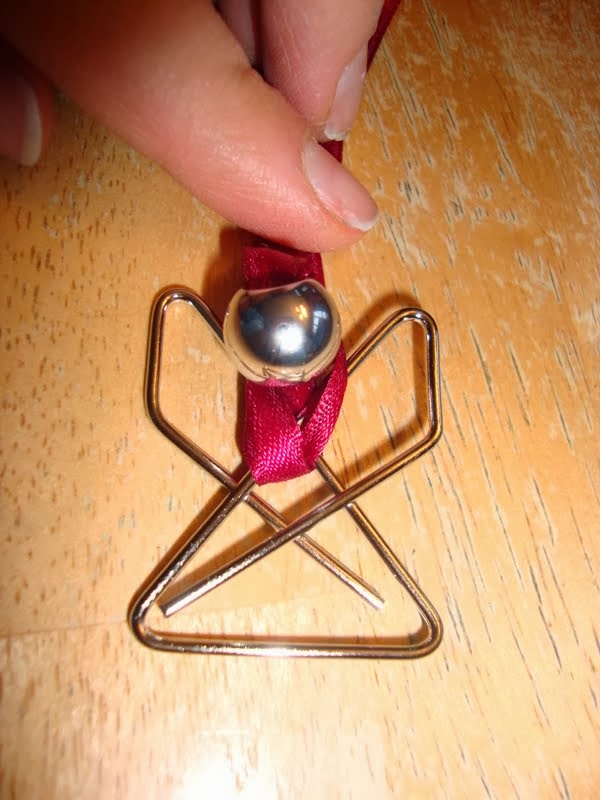 |
I let the boys pick out a button or pony bead and we threaded that onto our ribbon over the large beads and then we tied it off with a knot on the top that we could then put a hook through and hang on our tree. These were pretty simple and it was a very inexpensive craft which makes it perfect to bring to our homeschooling group later in the week!
 |
 |
| Finished and on our tree |
*Updated and reshared December 9, 2025


This is such a cute idea! My daughter in particular will want to give it a try. Thank you for sharing the tutorial at The Really Crafty Link Party. Pinned.
ReplyDeleteThank you!
Delete